Building a Website
Web App projects are Buildify's most powerful project type. When you create a Web App, the AI generates real, working code — HTML, CSS, JavaScript, and more — that you can preview instantly and publish to the web.
The website workspace
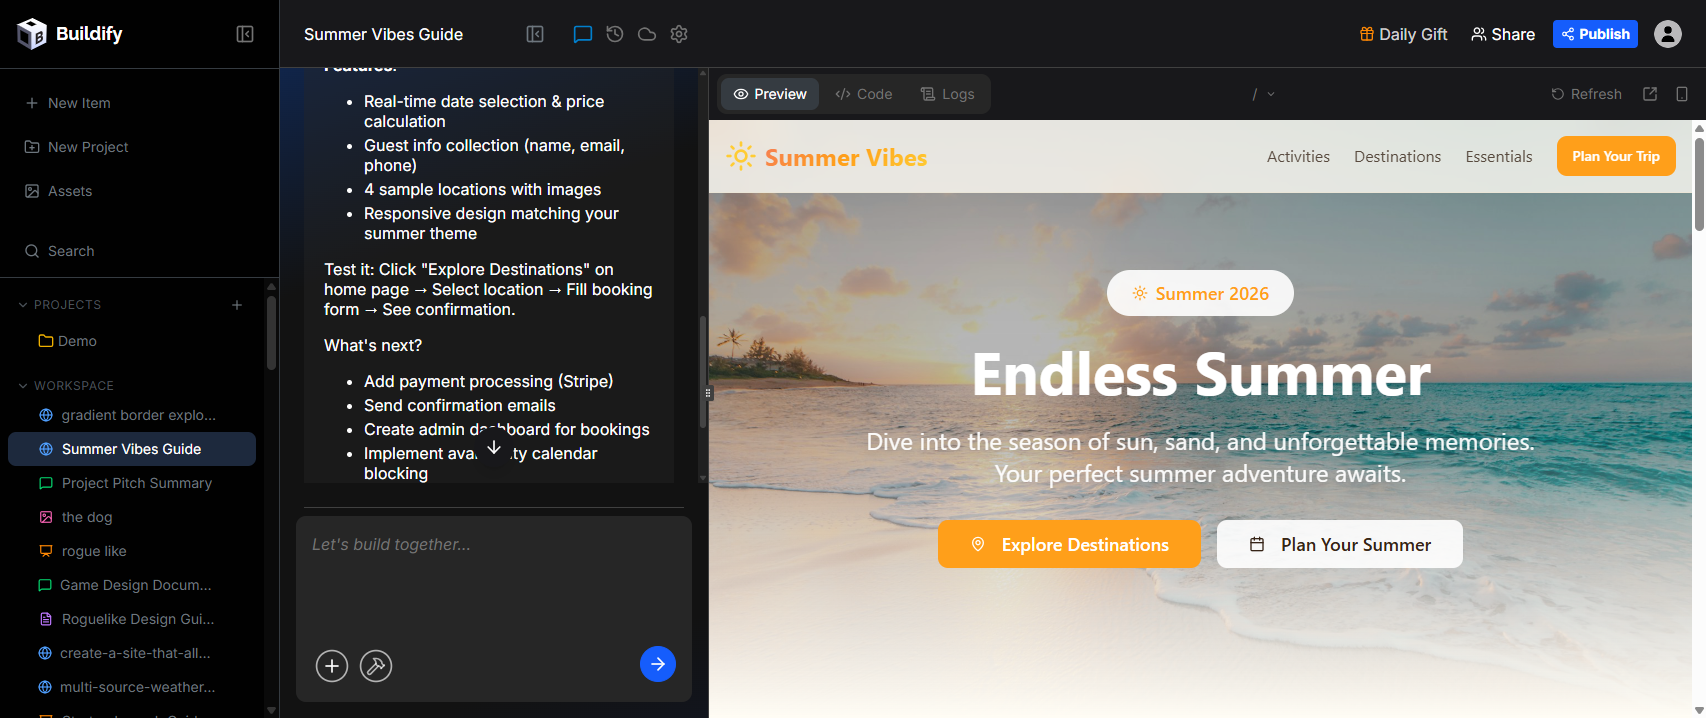
When you open a Web App project, the workspace is divided into two main panels:
Chat panel (left)
This is where you talk to the AI. Type instructions, ask questions, or describe what you want to change. The AI responds with explanations and applies changes to your code in real time.
The chat panel can be toggled open or closed using the Show chat button in the toolbar, giving you more space for the preview when you need it.
Preview / Code / Logs panel (right)
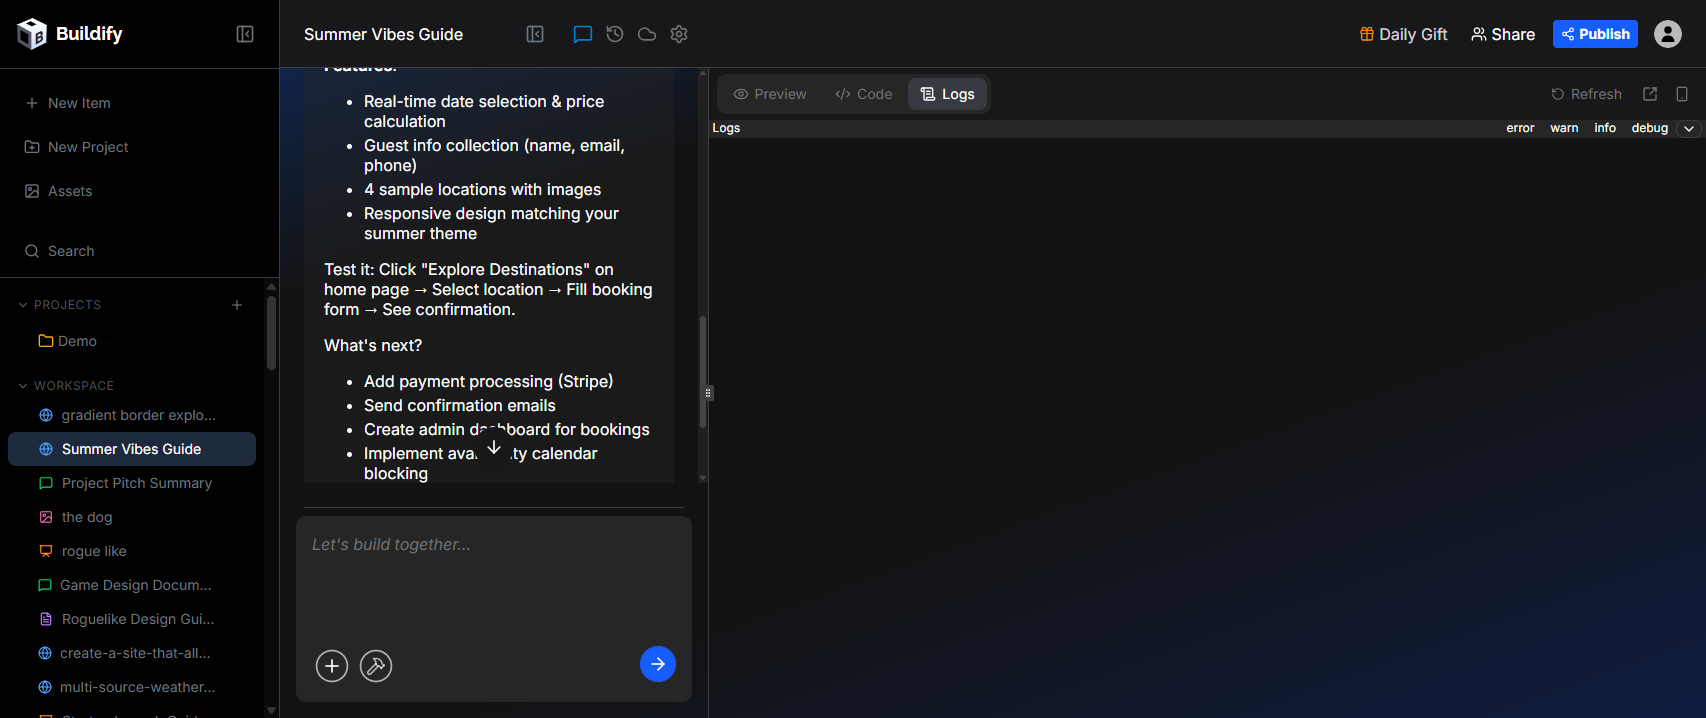
The right panel has three tabs:
- Preview — A real-time render of your website, exactly as it appears in a browser. Updates automatically as changes are applied.
- Code — The file tree and code editor. Click any file to view or edit it directly. Manual edits are supported here if you're comfortable with code.
- Logs — Console output and error messages from your running site. Useful for debugging JavaScript errors or checking network requests.
Toolbar icons
The toolbar at the top of the workspace contains several controls:
- Show chat — Toggle the chat panel open or closed
- Toggle history — Open the checkpoints/history panel to browse and restore past versions
- Connect Buildify Cloud — Connect a backend to your project (see Buildify Cloud docs)
- Project Settings — Access rename, thumbnail, visibility, clone, and delete options
- Share — Generate a shareable link to your project for others to view
- Publish — Deploy your current code to your public Buildify URL
Starting your website
- From the dashboard, select Web App as your project type
- Optionally choose a category (e.g. Landing page, Portfolio, E-commerce)
- Type a description of what you want to build
- Click the create button
The AI will generate an initial version of your website. This usually takes a few seconds to a minute, depending on complexity.
Navigating your files
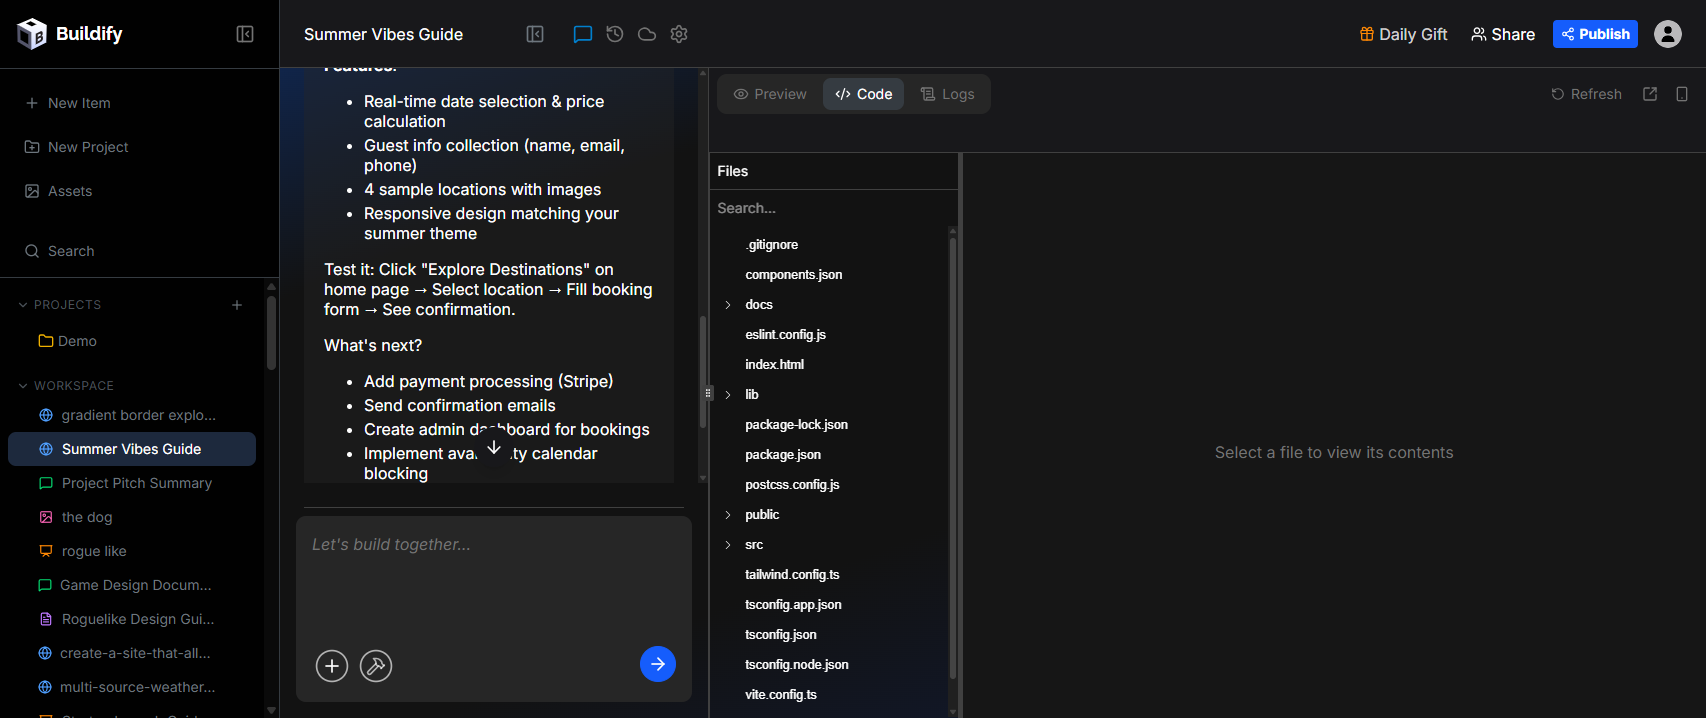
The Code tab includes a file tree showing all the files in your project. Buildify generates modern React applications using Vite and Tailwind CSS, so your project will include files like:
index.html— The HTML entry pointsrc/— Your React components and application codepublic/— Static assets like images and iconstailwind.config.ts— Tailwind CSS configurationpackage.json— Project dependenciestsconfig.app.json,vite.config.ts— TypeScript and build configuration
You typically won't need to touch these files directly — most changes happen through chat with the AI. But you can click any file in the tree to open and edit it in the code editor.
Making changes
The primary way to make changes is through the chat panel:
- "Change the hero headline to..." — Updates specific text
- "Add a contact form below the features section" — Adds new content
- "Make the color scheme darker and more minimal" — Adjusts design
- "Add a new page for pricing" — Creates new files and links
You can be as specific or as general as you like. If a change doesn't come out right, just ask the AI to try again or adjust it.
Per-message actions
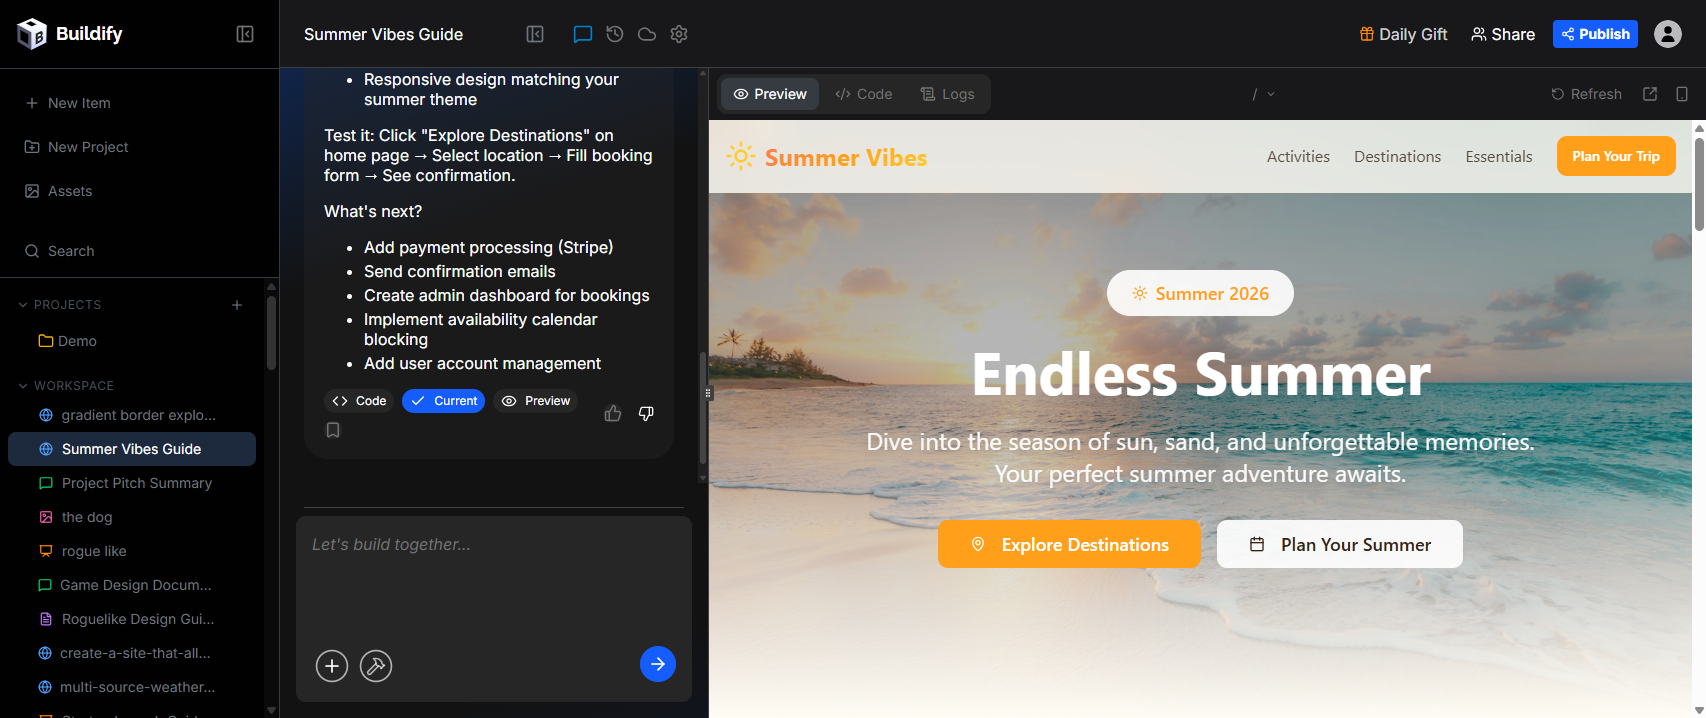
Each AI response in the chat has action buttons you can use after a change is applied:
- Code — View the code diff showing exactly what was added, modified, or removed
- Current / Restore — On your latest message this shows Current (the active state). On older messages it shows Restore — click it to revert the project back to that point in history.
- Preview — Jump to the preview panel to see the result
- 👍 / 👎 — Give feedback on the response
- Bookmark — Save this point in history as a bookmarked checkpoint so you can find it easily in the history panel
Mode Options
The Mode Options button (wrench icon) in the chat input lets you control how the AI applies changes. Use this to switch between different generation modes depending on how much control you want over each change.
Reviewing changes before applying
When the AI makes changes, you can click Code on any message to see the diff — a highlighted view showing exactly what's being added, modified, or removed. This gives you full visibility and control over what's happening to your code, even if you're not reading the code itself.